前言
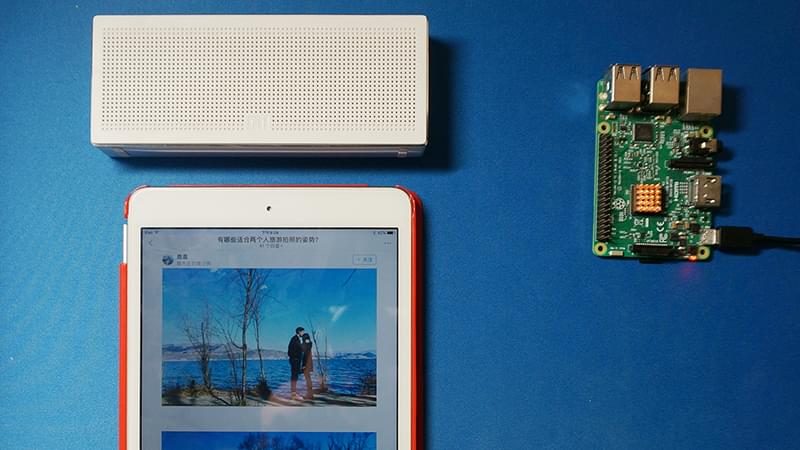
最近买了小米蓝牙音响,使用一段时间后发现小米蓝牙音箱有一个极其不方便的地方就是家里苹果设备比较多,想切换设备播放的时候就比较麻烦,还要断开操作。
于是萌生了一个想法,正好手上有个树莓派,能不能这样:
iOS设备->Airplay->树莓派->蓝牙->小米蓝牙音箱
因此这个问题可以分为两个部分:
- 1.树莓派蓝牙音频配置部分
- 2.树莓派Airplay播放部分
在解决这个问题的时候,我走了不少弯路,错路,目前网上没有完整的这个问题的解决方案,此文目的正是填补网络空白。
原料
- 树莓派3
- 小米蓝牙音箱
- iOS设备
开始
树莓派安装Shairport Sync
Shairport Sync实际上是Shairport的修改版,负责让树莓派发射出稳定的Airplay,之前我一直在使用Shairport,偶然间发现这个神器,让Shairport更加稳定好用,而且加入到系统进程,开机即打开Airplay。
安装前请确认是否安装以下依赖包:
apt-get install build-essential gitapt-get install autoconf automake libtool libdaemon-dev libasound2-dev libpopt-dev libconfig-devapt-get install avahi-daemon libavahi-client-devapt-get install libssl-devapt-get install libpolarssl-devapt-get install libsoxr-dev
随后下载Shairport Sync:
git clone https://github.com/mikebrady/shairport-sync.git
然后cd到相应目录,执行:
autoreconf -i -f
随后执行:
./configure --with-alsa --with-avahi --with-ssl=openssl --with-metadata --with-soxr --with-systemd
如果没问题的话,可以make了,此时该去洗手间去洗手间,该睡觉睡觉:
make
创建开机启动:
getent group shairport-sync &>/dev/null || sudo groupadd -r shairport-sync >/dev/null

getent passwd shairport-sync &> /dev/null || sudo useradd -r -M -g shairport-sync -s /usr/bin/nologin -G audio shairport-sync >/dev/null
然后运行:
sudo make install
最后输入,完成安装:
sudo update-rc.d shairport-sync defaults 90 10
树莓派安装蓝牙
打开终端,用普通用户权限执行:
sudo apt-get update
sudo apt-get updgrade -y
sudo apt-get dist-upgrade -y
随后安装蓝牙及管理软件
sudo apt-get install pi-bluetooth bluez bluez-firmware blueman
将pi用户添加到蓝牙组
sudo usermod -G bluetooth -a pi
还有很重要的一条,安装蓝牙音频配置
sudo apt-get install pulseaudio pulseaudio-module-bluetooth
随后重启一次树莓派,开机,在图形化界面中配对蓝牙,操作比较简单,记得在配对成功后对设备进行连接,省略。
也可通过bluetoothctl或hictool命令进行配对。
随后记下蓝牙设备的地址,XX:XX:XX:XX:XX:XX格式。
在此步,务必通过测试音频是否能够正常与蓝牙设备通信,记得软件中要勾选蓝牙设备,否则将从3.5mm端口输出音频。推荐使用vlc播放器。
配置蓝牙音频及Shariport Sync
安装依赖包:
sudo apt-get install libdbus-1-dev
sudo apt-get install libglib2.0-dev
apt-cache search libasound
sudo apt-get install libasound2-dev
配置及重新安装最新版bluez,此刻可以去洗手间和睡觉觉:
wget http://www.kernel.org/pub/linux/bluetooth/bluez-4.101.tar.xz
tar -xvf bluez-4.101.tar.xz
cd bluez-4.101
./configure --prefix=/usr --mandir=/usr/share/man --sysconfdir=/etc --localstatedir=/var --libexecdir=/lib
make
sudo make install
复制配置文件到目录:
sudo cp /home/pi/bluez-4.101/test/simple-agent /usr/bin/bluez-simple-agent
sudo cp /home/pi/bluez-4.101/test/test-device /usr/bin/bluez-test-device
sudo cp /home/pi/bluez-4.101/test/test-audio /usr/bin/bluez-test-audio
sudo cp /home/pi/bluez-4.101/audio/audio.conf /etc/bluetooth/
接着运行:
sudo apt-get install python-dbus
sudo apt-get install python-gobject
sudo cp /usr/lib/alsa-lib/libasound_module_pcm_bluetooth.so /usr/lib/arm-linux-gnueabihf/alsa-lib/
编辑audio.conf文件使shariport的音频从蓝牙设备输出:
sudo nano /etc/bluetooth/audio.conf
# 在[General]区域添加:
Enable=Sink,Socket
# 取消[A2DP]注释,并加入:
Maxconnections=4
打开蓝牙自启动:
sudo systemctl enable bluetooth
重启设备后,继续配置,打开asund.conf文件:
sudo nano /etc/asound.conf
pcm.bt_canz {
type plug
slave {
pcm {
type bluetooth
device XX:XX:XX:XX:XX:XX
profile "auto"
}
}
hint {
show on
description "Mi Speaker"
}
}
ctl.bt_canz {
type bluetooth
}
测试bluez能否使用:sudo bluez-simple-agent ,如果正常,按ctrl+c停止。
sudo bluez-simple-agent hci0 XX:XX:XX:XX:XX:XX
sudo bluez-test-audio connect XX:XX:XX:XX:XX:XX
测试是否连通:speaker-test -c 2 -D bt_canz
再次重启设备。
开启后编辑/etc/shairport-sync.conf :
sudo nano /etc/shairport-sync.conf
#去掉下面的注释,并加入bt_canz
output_device = bt_canz
保存!重启!开机即可用。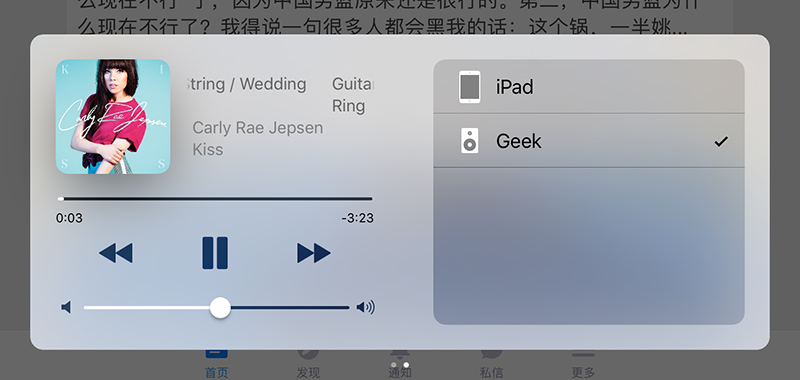
参考文章
https://github.com/mikebrady/shairport-sync/issues/200
https://github.com/mikebrady/shairport-sync
http://shumeipai.nxez.com/2014/12/10/raspberry-pi-using-airplay-wireless-audio-playback-achieve-even-putting-wifi.html
http://wangye.org/blog/archives/921/
http://blog.csdn.net/huayucong/article/details/51376461
http://blog.csdn.net/zhaoqi_0612/article/details/47731821
http://blog.csdn.net/techtitan/article/details/6165116
http://www.eeboard.com/bbs/forum.php?mod=viewthread&tid=45040&page=1